Japanese Rirekisho Photo Guide: Best Resume Picture Rules + RirekishoBuilder Crop Tool Tutorial
Please support us by sharing!
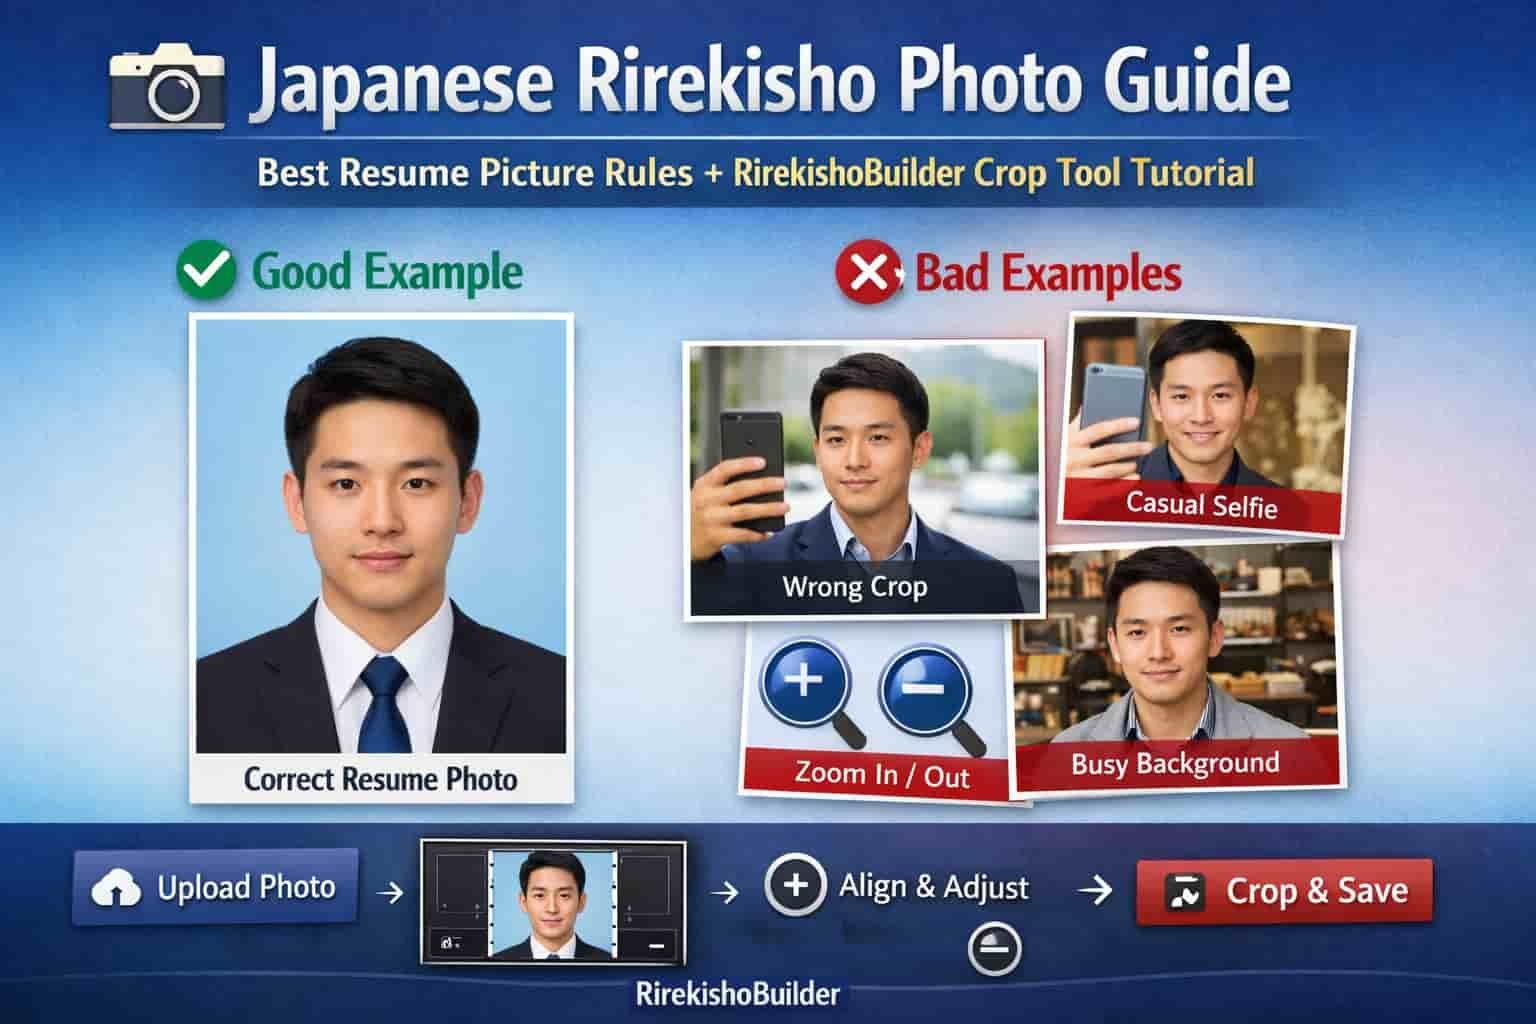
In Japan, a rirekisho photo (履歴書写真) is more than a profile picture—it’s part of the hiring standard.
A well-prepared photo can improve first impressions, while an incorrect one (selfie, wrong crop, casual background) can quietly hurt your chances.
This guide covers exactly what a proper Japanese resume photo looks like, common mistakes to avoid, and a full step-by-step tutorial
for using the RirekishoBuilder Photo Crop & Alignment Editor so your photo fits the rirekisho format correctly.
Why Resume Photos Matter More in Japan
Many countries don’t require photos on resumes, but in Japan the rirekisho format traditionally includes one. Recruiters expect a photo that shows you are:
- Professional: appropriate appearance for the workplace
- Careful: you followed the standard format and framing
- Prepared: you took time to submit a complete application
What a Proper Japanese Rirekisho Photo Looks Like
A correct rirekisho photo usually follows these rules:
- Recent photo: ideally within the last 3–6 months
- Head and shoulders visible: not too close, not too far
- Centered face: eyes near the upper-middle of the frame
- Neutral background: white, light gray, or light blue
- Natural lighting: no heavy shadows or dark filters
- Professional clothing: suit/jacket or neat business style
- Simple expression: neutral or light polite smile

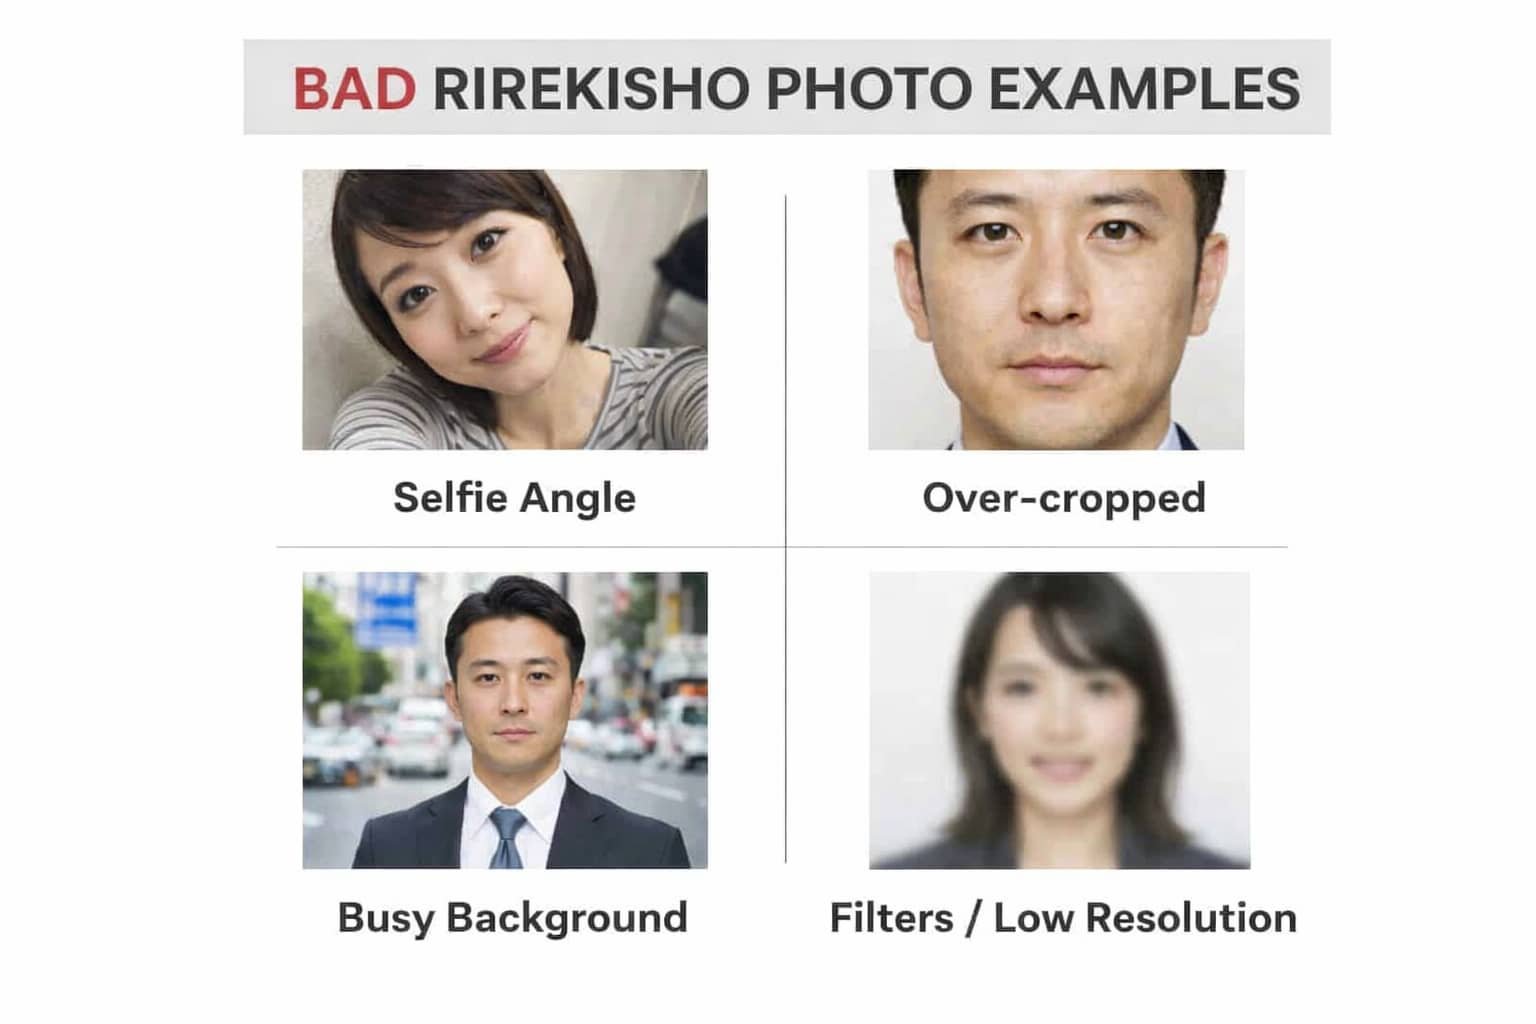
Common Mistakes That Make Photos Look Unprofessional
These are the most common reasons photos look “wrong” on a Japanese resume:
- Selfie angle: camera from below/above makes proportions look unnatural
- Over-cropping: forehead or shoulders cut off
- Too much background: face becomes small and unclear
- Busy background: room clutter, outdoor scene, strong colors
- Filters: beauty filters reduce trust and look casual
- Low resolution: blurry photos look careless
How RirekishoBuilder’s Photo Crop & Alignment Editor Works
To help users create a correct rirekisho photo without extra apps, RirekishoBuilder includes a built-in Photo Crop & Alignment Editor inside the resume editor.
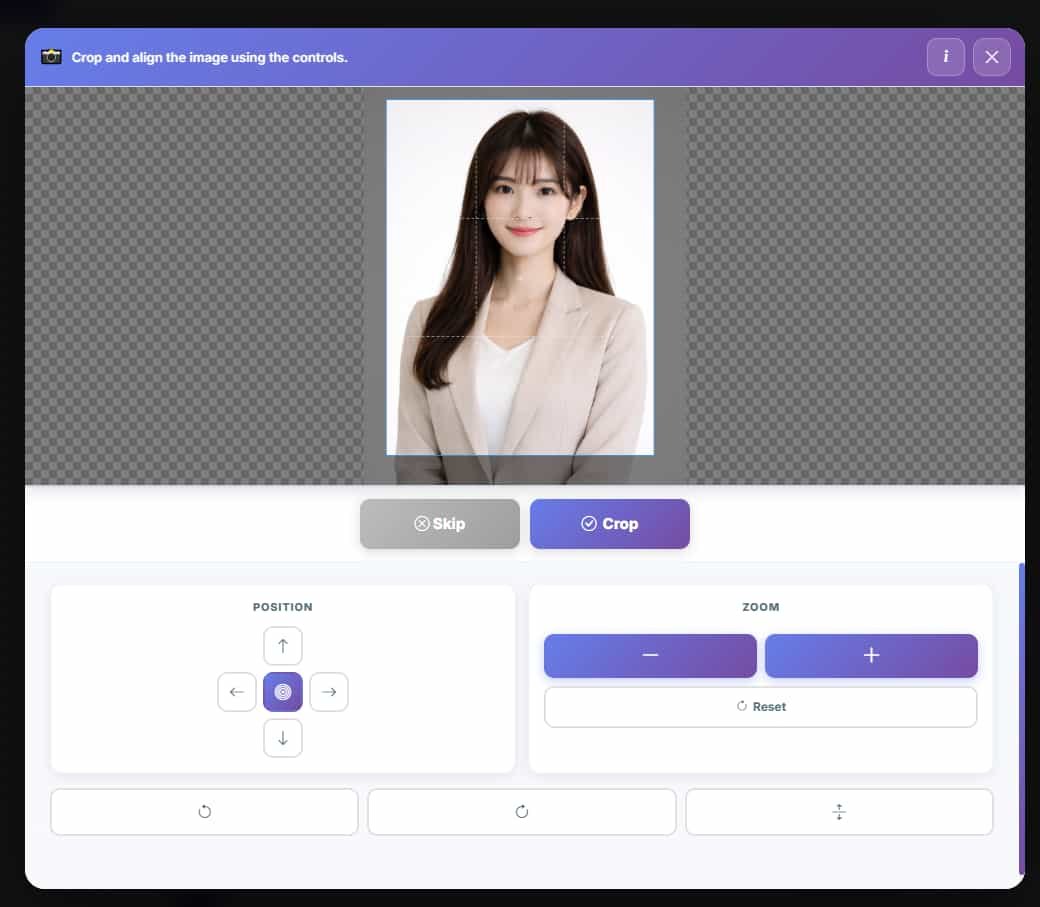
When you upload an image, the crop editor opens and gives you:
- A fixed frame designed for Japanese rirekisho photo layout
- Position controls to move your image left/right/up/down
- Zoom controls (+ / −) to adjust how close your face appears
- Reset to return to the default position anytime
- Crop to save the final corrected photo
Step-by-Step Tutorial: Cropping Your Photo Correctly
Follow these steps to create a proper rirekisho photo using the editor:
Step 1: Upload your photo
Upload a clear photo (front-facing is best). The crop editor opens automatically.
Step 2: Align your face inside the frame
Use the Position buttons (arrows) or drag the image (desktop/mobile) to center your face.
Your face should be clearly visible and centered.
Step 3: Use Zoom (+ / −) to adjust framing
Use + to zoom in if the face is too small, or − to zoom out if it is too close.
A proper Japanese resume photo should include your full head and shoulders.
Step 4: Confirm the correct area is visible
Before saving, confirm:
- Top of head is not cut off
- Both shoulders are included
- Face is centered and clearly visible
Press Crop to apply the final result and continue editing your rirekisho.
What the “Skip” Button Means (And When to Use It)
You may see a Skip button in the crop editor.
Skip is shown only when your uploaded image is under 5MB.
If you click Skip, the system will continue without cropping and use the image as-is.
However, we recommend using Crop whenever possible because:
- Most photos are not perfectly framed for rirekisho size
- Small misalignment can make the resume look unprofessional
- Cropping ensures your photo fits the rirekisho layout correctly
Quick Checklist Before You Submit Your Resume

Use this checklist to confirm your rirekisho photo is ready:
- Face is centered and clear
- Head and shoulders fully visible
- Neutral background (no distractions)
- Professional clothing
- No heavy filters
- Final crop looks balanced in the frame
Conclusion
A proper rirekisho photo is one of the easiest ways to improve your first impression in Japan.
The good news is you don’t need a studio or advanced editing skills—just a clear photo and correct cropping.
With the RirekishoBuilder Photo Crop & Alignment Editor, you can align, zoom, and crop your image in seconds to match Japanese resume standards.
Start building your rirekisho here:
Create Rirekisho